These bubble letter A ideas run from a free printable page to a 3D sculpture project that needs glue and patience.
What separates them is how permanent the result needs to be: a one-hour activity with markers, or a piece that sits on a shelf for years.
The half-inch clay thickness and behind-the-letter hollowing in the 3D version is the detail that shows the gap between them.
1. Craft Patterns
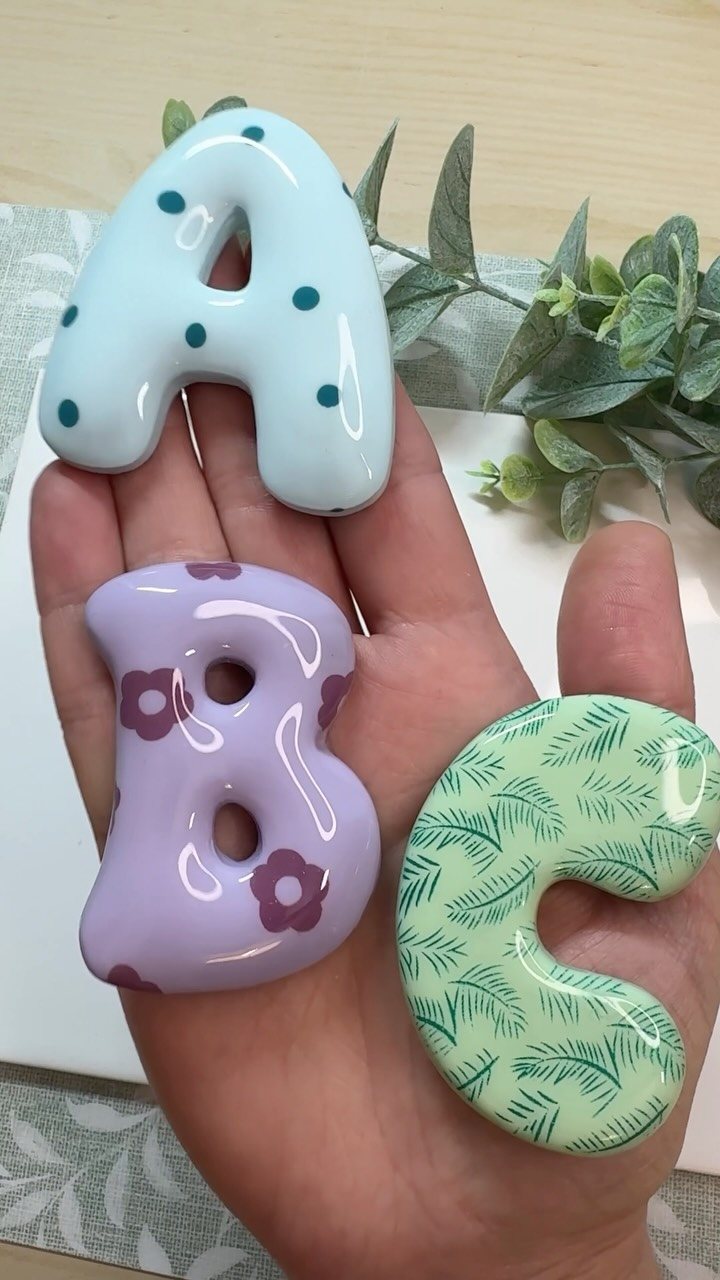
Glossy patterned bubble letters turn a basic cutout into something that reads finished from across a room.
For banners and scrapbooking, I print on cardstock, then seal with Mod Podge before adding the surface design; for quilting, the same templates work as applique guides with a quarter-inch seam allowance built in.
A floral bubble letter A at wall-banner scale reads from across the room without taking over the space. Smaller letters, 3 to 4 inches, layer better on scrapbook pages.
Store-bought shortcuts: printed scrapbook paper saves the hand-painting step. Tradeoff: the pattern competes with nearby photos, so I keep the letter size generous and the surrounding page clean.
2. Color and Decorate Bubble Letters
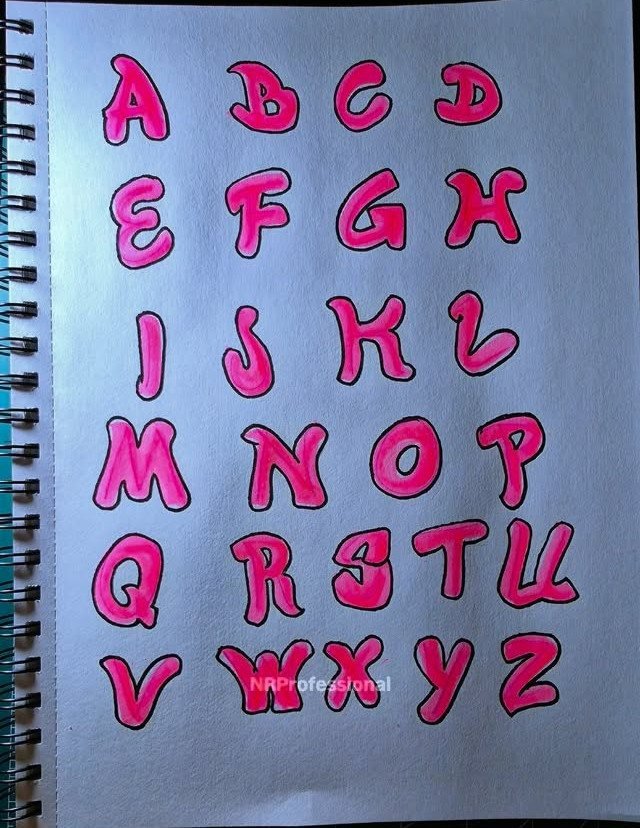
A full alphabet page in bright pink gives kids something to do with their hands while the letter shapes sink in.
I hand these out with a limited palette, three markers max; too many choices and they color without looking at the letter once.
The outline version works better for younger kids still learning pencil grip, since the thick black line forgives a wandering stroke.
For classroom use, the traceable sheets run well on draft-quality ink. The generator option lets you swap in school colors or tone the pink down if that matters for your group.
Best for ages 4 to 7, or any kid who needs the pressure off formal handwriting practice.
3. 3D Bubble Letter Sculpture
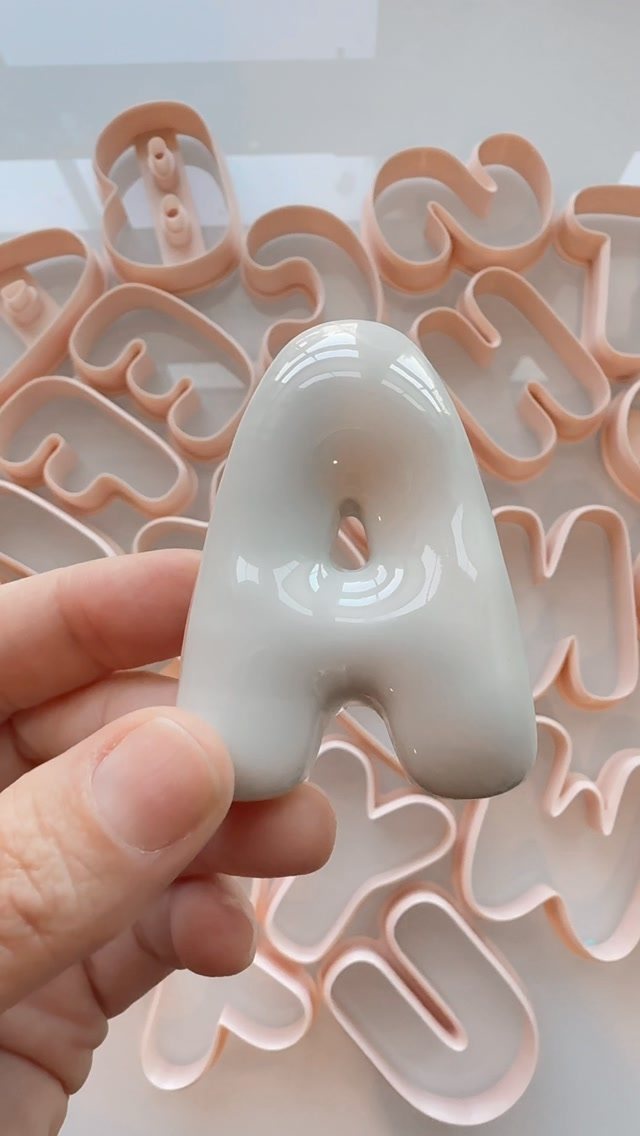
A ceramic bubble letter A has weight and presence that paper never touches.
I have not made these myself; the path I know starts with air-dry clay rolled to half-inch thickness, cut with a letter template, then hollowed from behind so it dries without cracking.
The clay needs to dry completely before acrylic paint and a gloss varnish go on. The puffy glaze on the photo piece suggests kiln firing, which changes the material cost and the skill level both.
For a one-off gift, the clay route runs cheap in materials. For a full name or a classroom set, paper mache over balloon forms dries faster and weighs less.
Your call on glossy versus matte; the photo chose glossy, and light catches it like pottery.
4. Hand-Drawn Outlined Bubble Letter
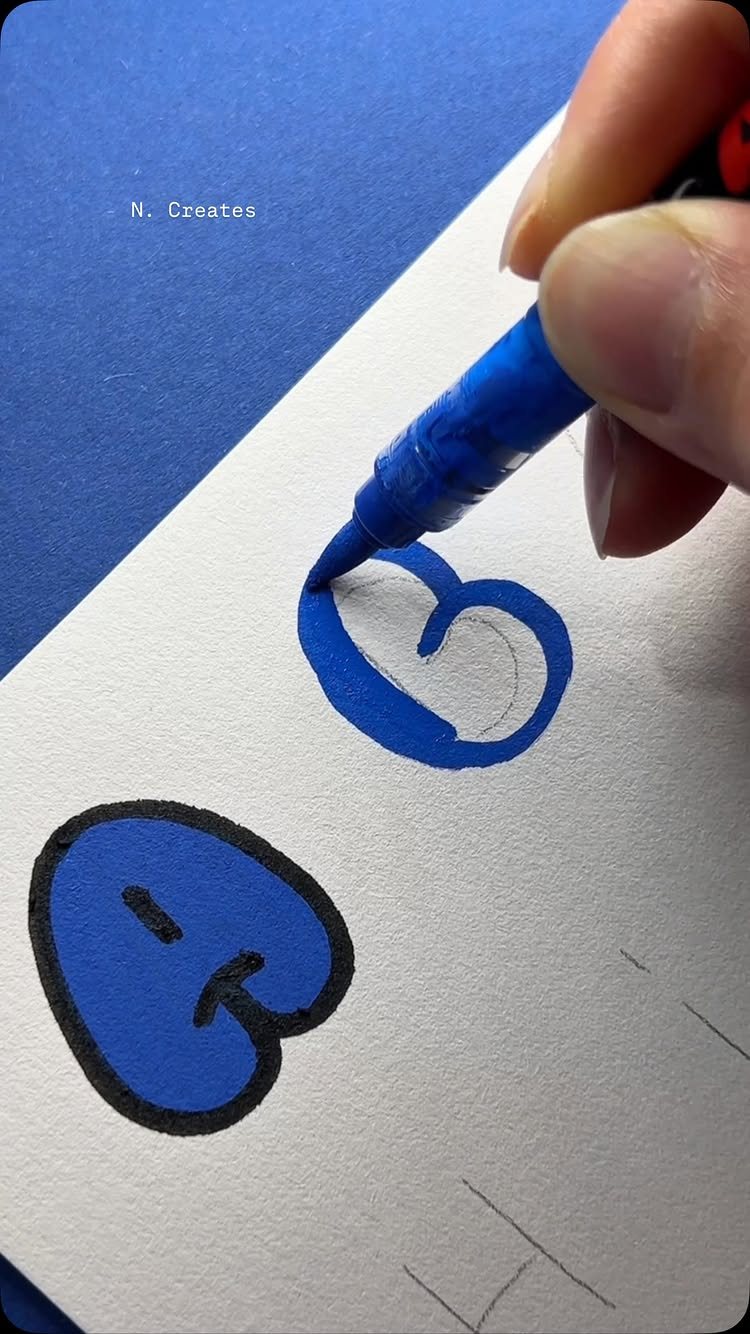
Thick black outline, solid blue fill: this is the bubble letter style most people picture first, and it is the easiest to teach.
A chisel-tip marker, not fine point, makes the outer stroke in one pass; I go around twice to build the weight, then fill with a lighter shade.
The B in progress shows the method: outline first, fill second, touch up last.
Paper quality matters more than you’d think. Marker bleeds on cheap printer stock; I use heavy paper that can take the ink.
For a poster that travels, laminate after the ink is fully dry. The clean graphic look suits name tags, locker labels, or any project where readability beats decoration.
5. Printable Bubble Alphabet Template
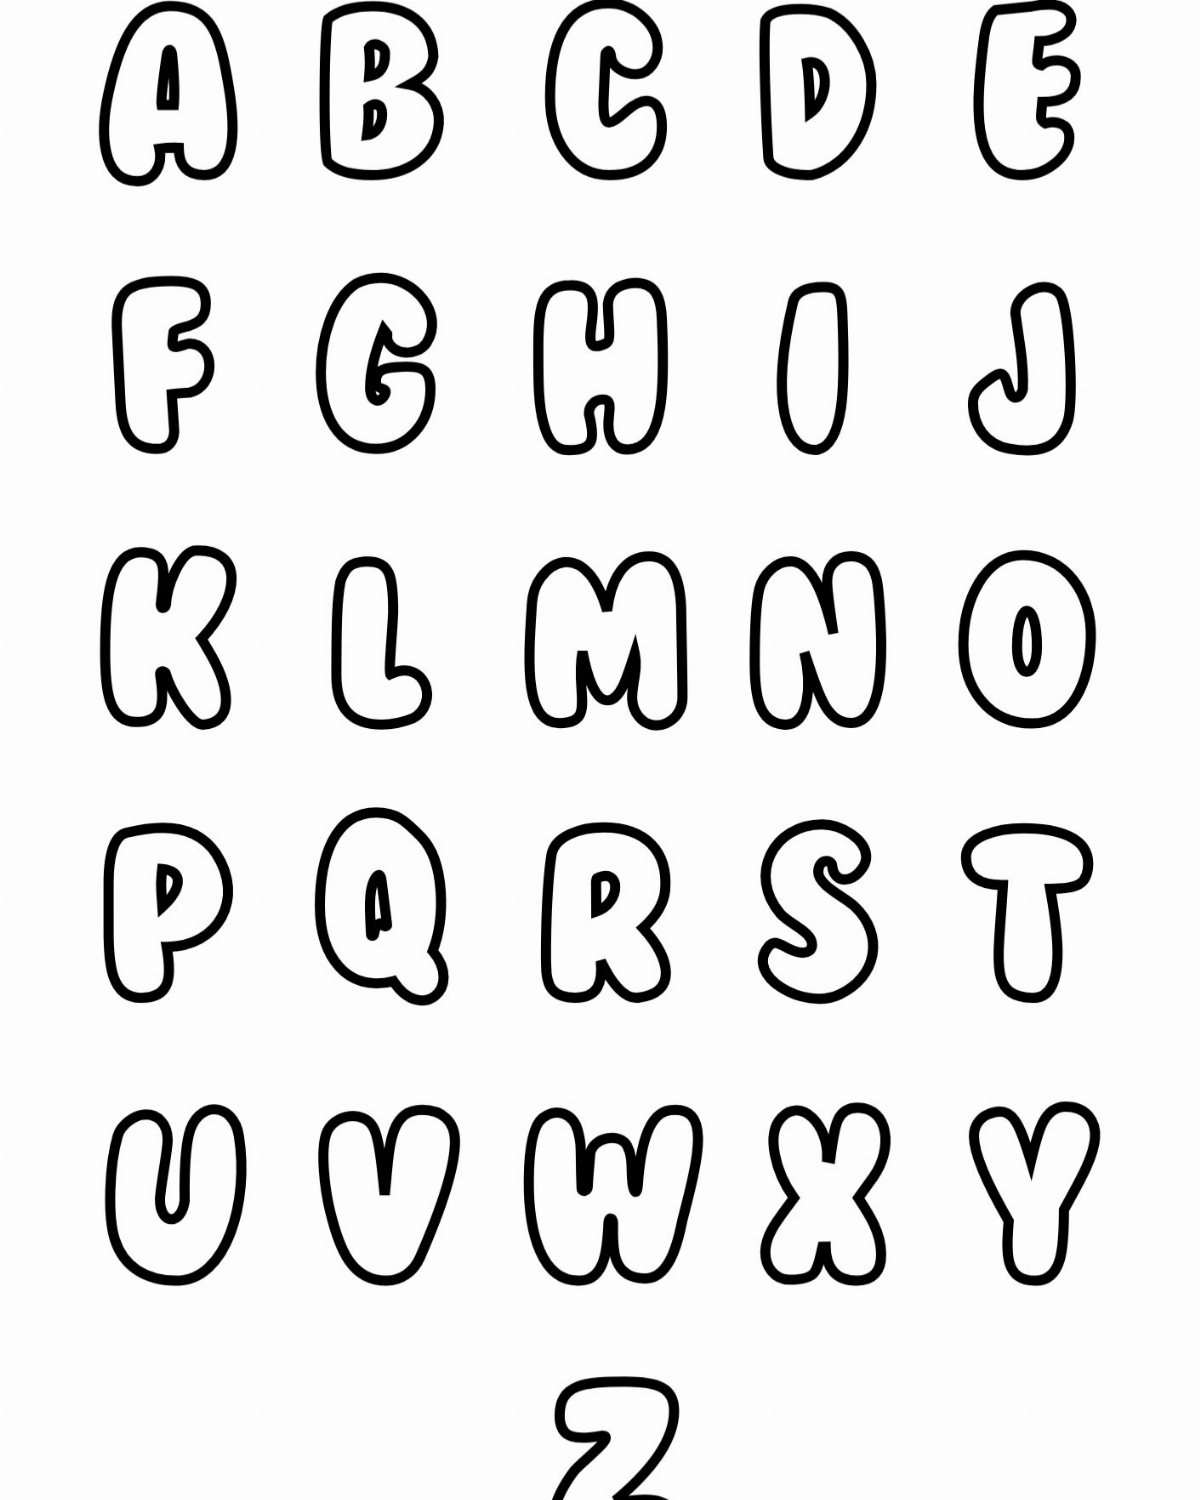
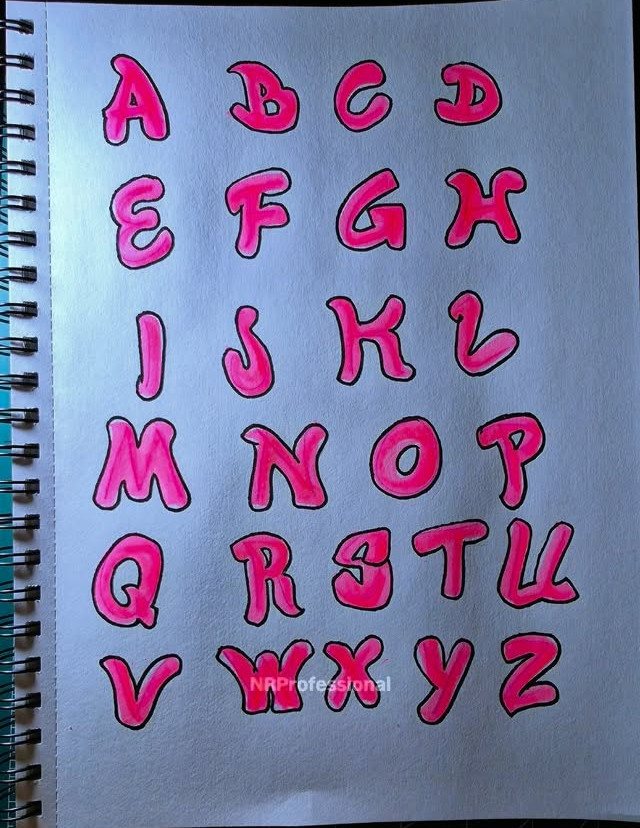
A full alphabet on one page saves the clicking around. I keep this template on my phone for impulse printing at the library or a friend’s house; the black outlines stay crisp even on draft settings.
Capital letters for posters and door signs, lowercase for tracing sheets and name practice.
The single-page size runs about 1.5 inches per letter, which works for banners if you do not need them huge. For larger letters, the individual page options scale cleaner.
I have used the uppercase set for alphabet displays and the lowercase for letter-of-the-week handouts; both print fine on standard paper. Check your margins if the rounded edges clip on your printer.
Free Printable Resources
Every template worth using for bubble letter projects stays free for personal and classroom use. Some collections now include bubble numbers and punctuation, which helps if you are making a birthday banner or a classroom number line.
I keep the full alphabet PDF on my phone for library printing. Draft-quality ink handles the outlines fine; the rounded edges only clip if your margins are set too narrow.
Creative Crafting
The same template serves quilting, scrapbooking, and gift cards without much change. For applique work, I add a quarter-inch seam allowance by eye and cut on the line.
Scrapbook paper printed with the letter shape skips the hand-painting step, though busy patterns fight with nearby photos unless you size the letter large and keep the page clean.
Hollow the back so it dries flat, then seal with gloss varnish if you want the ceramic look without the kiln.
Educational Uses
Older children copy the printed bubble letter onto blank paper, then work it into posters and artwork.
Customization Options
Some generators let you change the font weight or swap the fill color before you print. I use this for classroom labels that match a theme, or for banners where one letter needs to pop as the initial.
For a single-page alphabet, check your margins before you print; the letters need room to breathe. The rounded edges clip on some default settings, and reprinting at the library costs more than the template did.
Frequently Asked Questions
Can I print bubble letter A for free?
Yes. Every template on this page prints free for home, classroom, or craft use; the link opens a full-size uppercase A with no signup.
I keep the full alphabet template on my phone for impulse printing at the library; the black outlines stay crisp even on draft settings.
Does this page include lowercase bubble letter a?
Yes. Uppercase and lowercase both print from this page, which covers the full alphabet practice most worksheets need.
Can I trace bubble letter A?
Yes. The traceable option prints as a hollow outline, so one sheet works for handwriting drills and coloring without draining ink.
How do you draw a bubble letter A?
Draw a plain capital A first, then loop a rounded border around each leg and crossbar, softening every corner into a curve.
A chisel-tip marker, not fine point, makes the outer stroke in one pass; I go around twice to build the weight, then fill with a lighter shade.